For several assignments in my online course, I require my students to embed image(s) into their postings in Blackboard. Below are the steps I’ve outlined for how to post a photo so it is embedded (ie: viewed in line with the text of your discussion post).
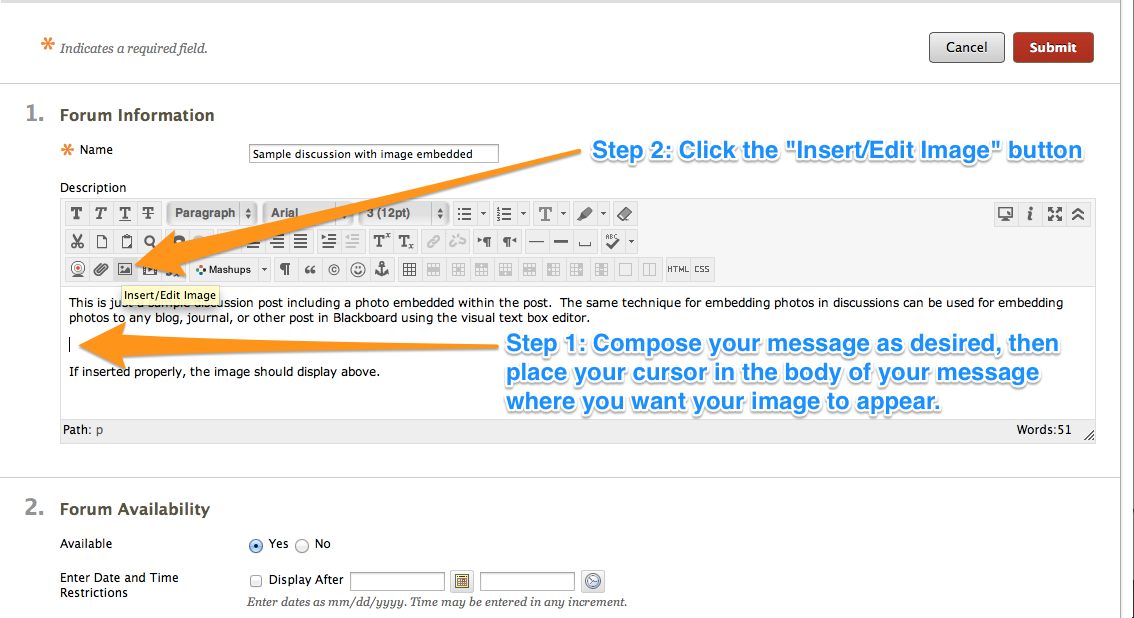
Step 1: Compose your message as desired, then place your cursor in the body of your message where you want your image to appear.
Step 2: Click the “Insert/Edit Image” button.
Step 3: Click the “Browse My Computer” button and locate the image on your computer that you wish to embed.
Step 4: Enter “Image Description” and “Title”
Step 5: Click the “Insert” button

Step 6: Click the “Submit” button (if discussion) or “Post Entry Button” (if journal or blog)
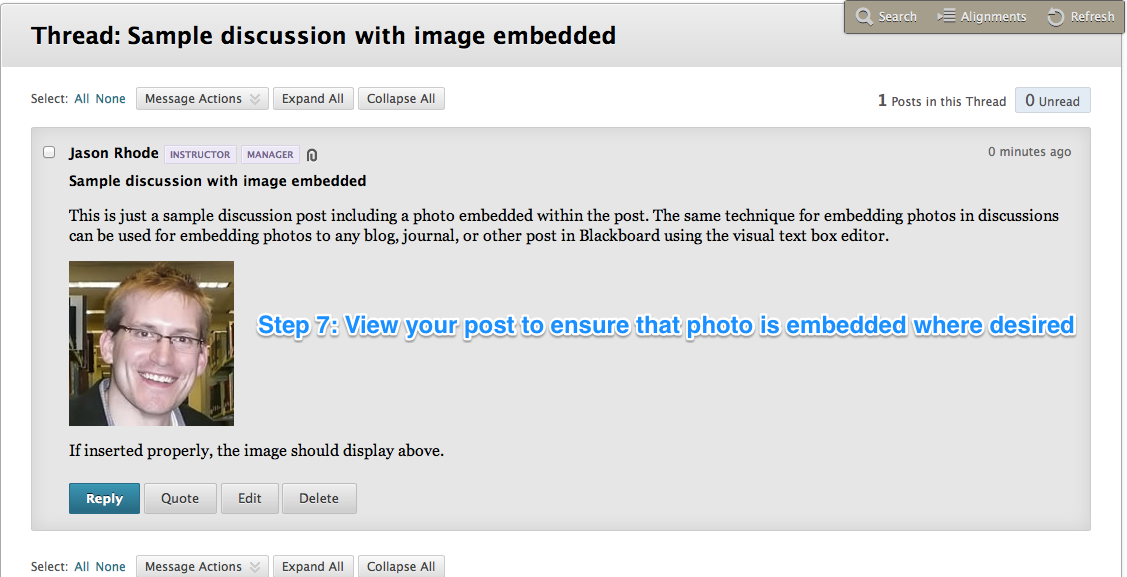
The photo you selected should be displayed where you cursor was located in your post.

Step 7: View your post to ensure that photo is embedded where desired
Whenever you are asked to post a photo in Blackboard, it’s always preferred that you embed the photo as described above instead of attaching otherwise.


this feature doesn’t exist anymore, and i can’t find any alternative. an updated tutorial would be greatly appreciated